That feeling of landing a new client is fantastic. What’s not? The messy scramble of follow-up emails, forgotten attachments, and the awkward "so, what's next?" kickoff call. If your post-sale process feels more chaotic than professional, you're not just wasting time—you're killing the excitement your client had when they signed. It’s time to stop the welcome-call chaos and build an automated onboarding system that sells your value before you even start the work.
Key Takeaways: What a "Zero-Touch" System Gives You
- Reclaim Your Time: Automate the repetitive admin tasks (contracts, questionnaires, scheduling) and get hours back each week.
- Look Like a Pro (Instantly): A smooth, predictable onboarding experience signals to clients that you're an organized, high-value professional, not just a gig worker.
- Boost Client Retention: A great first impression sets the tone for the entire project. Happy clients are repeat clients.
- Eliminate Costly Errors: By systematizing data collection, you ensure you have all the correct information, assets, and logins right from the start.
- Focus on Strategy, Not Paperwork: Free yourself from administrative drag to focus on the strategic work that clients actually pay you for.

Why Your Manual Onboarding Is Costing You More Than Just Time
Every minute you spend manually sending a welcome email, chasing a client for a logo file, or building a project folder from scratch is a minute you’re not spending on billable work. But the cost is deeper than that. A clunky onboarding process creates friction and doubt in the client's mind. It quietly asks, "If they're this disorganized now, what will the actual project be like?"
Let's make this tangible.
- Before: You spend two hours chasing a client for documents and login credentials via a confusing email thread. The kickoff call is delayed because you're still missing key info.
- After: An automated workflow collects all necessary assets via a smart form and files them in a shared folder *before* the kickoff call is even scheduled. The first meeting is pure strategy because the logistics are already handled.
This isn't about removing the "personal touch." It's the opposite. By automating the robotic tasks, you free up your time and mental energy to provide a better, more personal, and strategic experience for your new client.
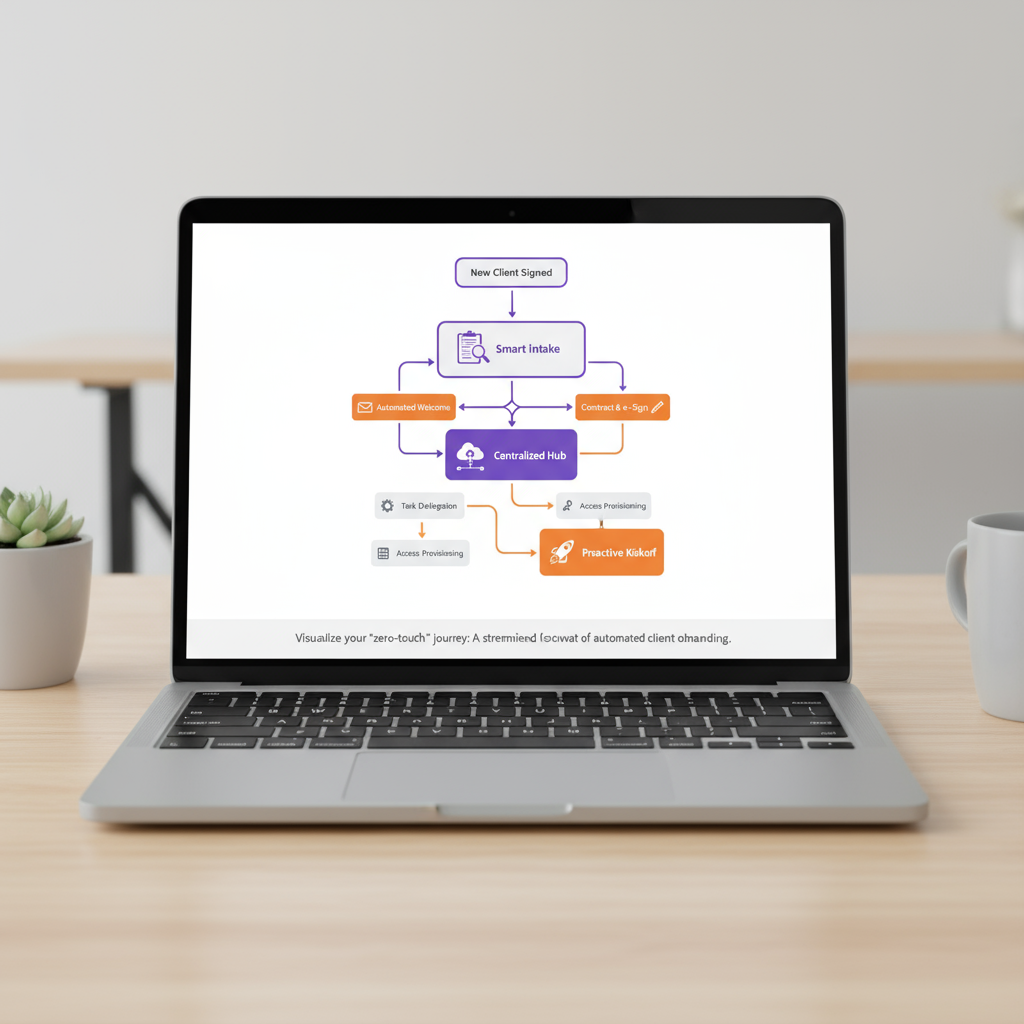
The 4-Stage "Zero-Touch" AI Onboarding Framework
Ready to build it? This framework breaks the process into four distinct stages. The goal isn't to do it all at once. Start by automating Stage 1, and once that's solid, move to the next. You can connect these stages using tools like Zapier, n8n.io. or Make.com.
Stage 1: The Smart Intake (Capture)
It all begins the moment a client says "yes." Instead of sending a long email with a dozen questions, you send a single link to an intelligent intake form. This form is the cornerstone of your entire system.
Your Toolbelt: Tally or Makeform.
How to Action It: Create a form that uses conditional logic. If they select "Web Design" as a service, show them questions about their hosting provider. If they select "Copywriting," ask for their brand voice guide. The data from this form will be the fuel for the rest of your automation. A well-designed intake form makes you look incredibly thorough and professional.
Your Livesume professional page is the front door to your business. A Zero-Touch Onboarding system is the red carpet you roll out once a client steps inside. Ready to build yours? It all starts with the intake form.
Stage 2: The Automated Welcome (Connect)
Once the client hits "submit" on your form, the magic happens. This is where you trigger the first "wow" moment without lifting a finger. The goal is to deliver key documents and a personal welcome immediately.
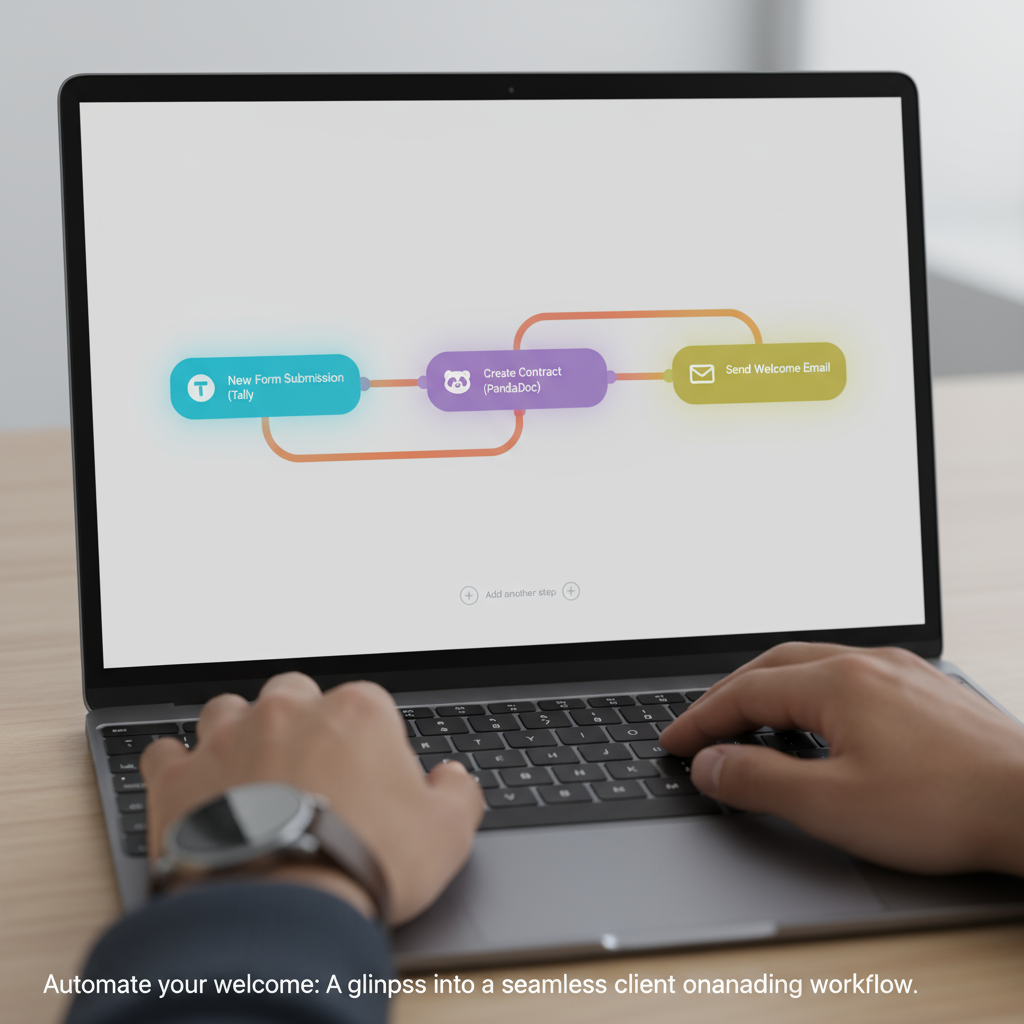
Your Toolbelt: Zapier and PandaDoc (or Dropbox Sign).
How to Action It: Create an automation (a "Zap" in Zapier). The trigger is "New Form Submission." The actions are:
- Create a new contract in PandaDoc, automatically filling in the client's name and project details from the form.
- Send a welcome email that includes the contract link and a link to a short, pre-recorded welcome video from you using Loom. This adds a powerful personal touch.

Stage 3: The Centralized Hub (Organize)
Chaos comes from scattered information. To combat this, you need a "single source of truth" for each client—a centralized dashboard where all project info, files, and communications live. Your automation builds the foundation for this hub.
Your Toolbelt: Notion or Airtable.
How to Action It: Add another step to your Zapier workflow. After the form is submitted, the automation should create a new project page in your Notion workspace from a pre-built template. It can auto-populate the client's name, project goals, and contact info directly from the form. This is a game-changer for staying organized and managing project scope, a topic we dive into in our freelance scope shield guide.
- Before: You search through five different email threads and a messy Google Drive folder to find a specific password or document.
- After: You have one-click access to the client's dedicated Notion dashboard, where everything is organized and instantly accessible.
Stage 4: The Proactive Kickoff (Prepare)
The final stage of onboarding is preparing for a successful kickoff call. This involves scheduling the meeting and ensuring all initial assets are collected—both of which can be automated.
Your Toolbelt: Calendly and Google Drive (or Dropbox).
How to Action It: In your automated welcome email (from Stage 2), include your Calendly link for the client to book their kickoff call. Then, use your automation to create a shared Google Drive folder for the client and link to it in the welcome email with a request to upload any necessary assets before the call.
Which Tools Should You Stack? A Quick Comparison
The beauty of this system is its flexibility. You can swap tools based on your budget and needs. Here’s a quick rundown:
- Automation Engine: Zapier is incredibly user-friendly and connects to almost everything, making it great for beginners. Make.com offers more complex, visual workflows and is often more cost-effective for high-volume tasks.
- Project Hub: Notion is an all-in-one powerhouse for creating custom client dashboards, notes, and databases. If you prefer a simpler, visual approach, a tool like Trello with AI-powered automations can work just as well for tracking tasks.
- Forms: Tally offers unlimited forms and submissions for free, making it an unbeatable starting point. Makeform provides AI-driven form creation to get you started even faster.
This entire process is part of a larger freelance OS. If you're looking to automate more of your business, be sure to check out our guide on building an automated client-winning system.
Answering Your Top Questions About Automated Onboarding
How do I automate my freelance client onboarding?
Start small. Map your current process, identify the biggest bottleneck (usually the intake/questionnaire phase), and use a tool like Zapier to connect a smart form (Tally) to your email and project management tool (Notion/Trello). This simple connection is the core of an automated system.
What is the best software for client onboarding?
There's no single "best" software, but rather a "best stack." A great starting stack is Tally (for forms), Zapier (for automation), PandaDoc (for contracts), and Notion (for the client hub). They all have robust free or entry-level plans.
How can I use AI to improve my client experience?
Use AI to handle the impersonal admin work so you can provide better personal service. AI-powered forms can ask smarter questions, automation can deliver contracts and welcome kits instantly, and AI in project management tools can help draft project timelines. This speed and efficiency makes the client feel valued from day one.
What are the essential steps in a client onboarding process?
The five core steps are: 1. Sign the contract and pay the invoice. 2. Complete a detailed intake questionnaire. 3. Receive a welcome packet with key info. 4. Schedule the official kickoff call. 5. Provide access to a centralized project hub.
How do I create an onboarding questionnaire for new clients?
Work backward from your project kickoff. What information do you absolutely need to start? Group questions into sections: Business Info, Project Goals, Target Audience, Competitors, and Logistics (like logins). Use a tool with conditional logic to avoid asking irrelevant questions.
What should be included in a client welcome packet?
Your welcome packet should be a PDF or Notion page that includes: a welcome message, what to expect in the first week, your primary contact info and business hours, links to your project hub and scheduling tool, and a clear outline of the communication plan.
Turn Your Onboarding Draft Into a Client-Ready System
An automated system might seem complex, but you can build it piece by piece. You don't need to be a tech expert; you just need to be systematic. Here's how to start today.
- Map Your Current Process: Grab a pen and paper and sketch out every single step you currently take to onboard a client. Be honest about where the delays and messy parts are.
- Automate One Thing First: Don't try to build the whole system at once. Start with the intake form. Replace your email questions with a Tally form. This one step alone will save you hours.
- Test, Refine, and Connect: Once your form is working well, connect it to your project management tool using Zapier. Then, connect it to your contract software. Layer on one automation at a time.
You've built the system that impresses clients after they've signed. Now, ensure the very first impression is just as powerful. It all starts with your Livesume page—the perfect front door for your new, streamlined, and incredibly professional freelance business.